A DIY Guide To Dining Al Fresco
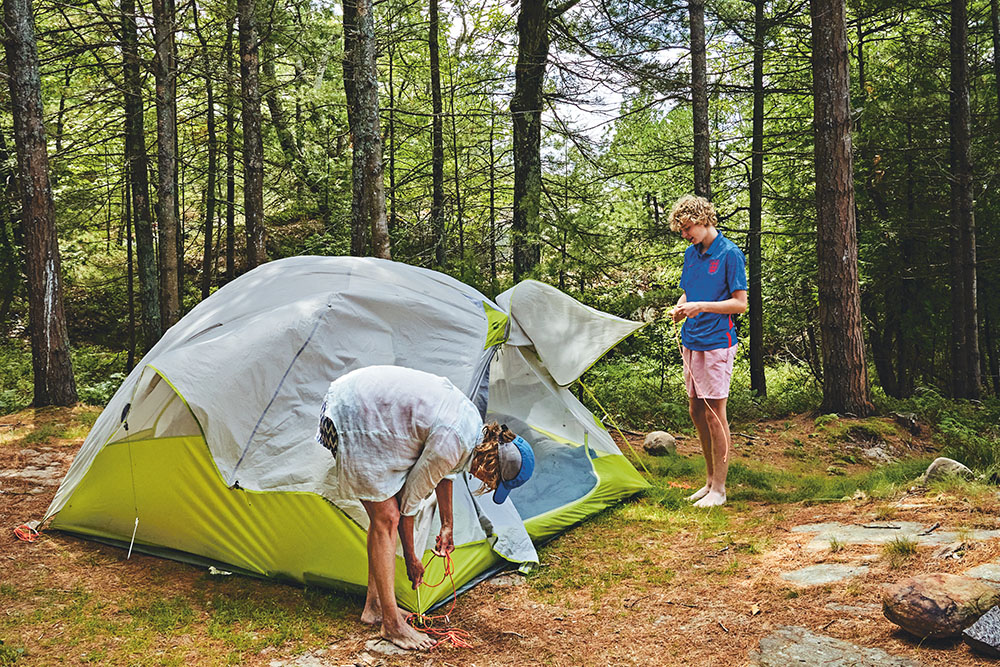
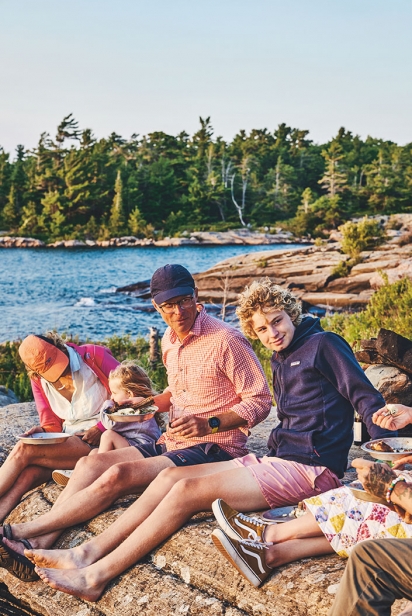
As winter becomes a distant memory and we emerge from hibernation from the Canadian cold, thoughts turn to eating al fresco — be that a picnic on a road trip, a summer celebration in a park or even longer excursions into the magnificent wilderness.
However, for food lovers, this can present a problem. Do we sacrifice our love for making the best of every meal in the oh-too short summer season when fresh ingredients are at their finest, opting instead for easy-to-carry, ready-made or freeze-dried substitutes? Or do we stagger under the weight of over-loaded backpacks, messy leftovers leaking through every zipper and the prospect of lugging a cooler over hill, down dale and through every portage?
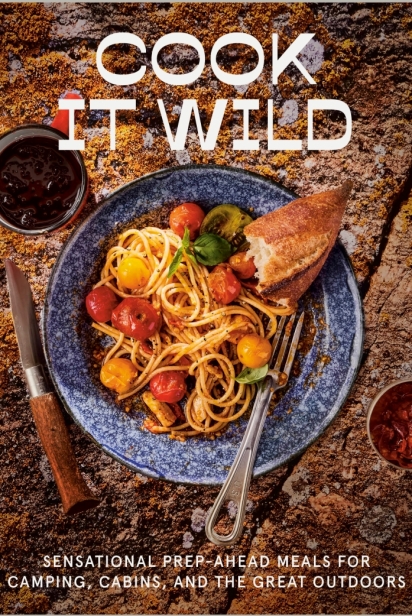
As it turns out, none of this is necessary. Thanks to Chris Nuttall- Smith’s new book, Cook It Wild: Sensational Prep-Ahead Meals for Camping, Cabins, and the Great Outdoors, you can have your nature fix and eat it too. Nuttall-Smith, a food writer, restaurant critic for The Globe and Mail and judge on TV cooking shows, has written the definitive guide for campers whose tastebuds demand “no compromise,” even 100 miles from the closest Michelin-starred restaurant. And it all comes down to planning, much like any military campaign.
Once you’ve confirmed that your canoe isn’t leaking and your backpack hasn’t been eaten by mice over the winter, it’s time to turn your attention to the more important questions of how to enjoy a flank steak, ribs and paella while deep in the woods. And that’s to say nothing of a fresh lime margarita when the going gets hot.
Nuttall Smith, who spends upwards of 45 days out in the wilderness annually, says it means planning every mouthful that you will consume. From calories to content, from shelf-life to crushability, every detail matters. Because if you don’t eat it while on the go, you’re going to be carrying it back out, one way or another.
Cook It Wild is at once a manual — it’s packed with handy tricks and practical information — and a homage to great eats. Photos of mouth-watering, sticky, fire-cooked food served on everything from tinfoil to wooden boards, metal roasting tins to enamel plates, accompany most recipes for inspiration.
But first, to business. Nuttall-Smith advises to chop ahead, mix ahead, cook ahead, seal ahead and freeze ahead. By this, he means that if you can advance your meals as far as possible to completion before setting out, you’ll have a much easier time once you’re trying to get a meal in a bowl for your bunch of dirty, hungry camping companions.
He offers useful tips for carrying the most difficult ingredients such as eggs, tender herbs and soft summer fruits. Eggs should be broken, beaten and frozen raw at home, then kept chilled and used within two days of the start of your trip. Alternatively, for whole eggs, you should choose unwashed eggs if you can get them direct from a farm (they can be kept out of the fridge for up to two weeks so therefore travel better), then double wrap them in the cardboard boxes in which they come and put them in a resealable bag.
Also included are tips for building the perfect cooking fire. Did you know that it should have three zones: the fire zone, one for cooking over hot coals and a warm, resting zone? Over this fire, you can roast practically anything, and you can even cook a whole egg, nestled in the ashes.
From fire to ice
It also turns out that there’s a knack to successfully packing a cooler. No, you don’t just throw it all in, along with a couple of ice blocks. First, you line the base with solid ice blocks, then you pack your food, paying attention to the order in which you intend to eat it, first meals at the top, then fill in any air gaps with ice cubes, before covering with an ice mat just below the lid.
For novice campers, Cook It Wild will explain how to deal with trash, keep your food safe from animal marauders, wash dishes in the wilderness (no, giving them a scrub in the lake won’t do), create clean drinking water and keep your food safe from cross contamination, growing mold and dangerous toxins such as botulism that can develop quickly on raw garlic, for example. Garlic is one ingredient that it is best not to prepare ahead of time — take whole cloves. Nuttall-Smith also advises taking salted butter. Salt is a preservative, so it keeps longer.
Recipes are divided into At Home and At Camp steps and also feature a section called Keeps, which indicates how long the ingredients will typically keep before turning rancid. There are icons to indicate any special equipment needed, whether suitable for cooking over a fire or camping stove, for hikers, paddlers or campers with wheels.
However, even with years of practice under his belt and the most precise planning, things can still go hilariously wrong: One such trip involved a Dutch-oven pizza that never cooked because a downpour prevented the fire from getting hot enough. Soggy pizza anyone? “It’s not foolproof, which is why it isn’t in the book,” Nuttall Smith says.
When you spend over six weeks a year camping, your odds of success increase dramatically. “I’ve had a lot of pretty great camping meals, and they’ve ranged from really simple (the instant shallot and cheese fondue in the book), to more involved (but not too involved) [such as] the paella in the book, which has become a real go-to on our trips,” Nuttall-Smith says in an interview by email.

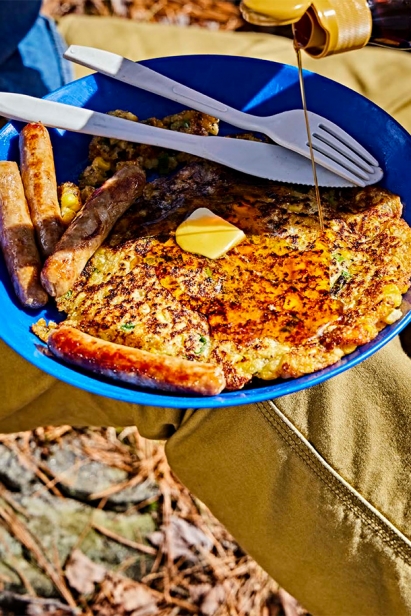
Corn, cheddar and green onion skillet cake
Serves 4 to 6
These crispy buttermilk-and-cornmeal skillet cakes pop with juicy corn kernels, and crunch at their edges with bits of pan caramelized cheddar cheese.
At home
1 cup all-purpose flour
1 cup cornmeal
¼ cup buttermilk powder
¼ cup granulated sugar
¼ cup chia seeds or ground flaxseed
4 teaspoons baking powder
¾ teaspoon kosher salt
1½ cups finely grated cheddar cheese
At camp
12 ounces maple-flavoured breakfast sausages (optional; thawed) [F - Frozen]
Prepared dry mix [F]
2 cups water
10 green onions, sliced
1 cup corn kernels, fresh or frozen (thawed) [F]
3 tablespoons salted butter (thawed) [F]
¼ cup pure maple syrup (thawed) [F]
Mix and pack
In a resealable bag or container, combine the flour, cornmeal, buttermilk powder, sugar, chia seeds, baking powder, salt, and cheddar, making sure to toss the cheese well in the mixture to coat. Refrigerate or freeze. (It will keep for 2 months, frozen.)
Cook the sausages (if using)
In a medium, nonstick skillet over medium heat, fry the sausages until they’re well-browned and cooked through. Transfer to a plate and cover to keep warm.
Mix the batter
Meanwhile, in a medium bowl (or other batter-worthy vessel), combine the dry mix and water. Stir to incorporate but don’t overmix. Add the green and corn, fold them in, and let this batter rest for 5 minutes to thicken.
Cook the skillet cakes
Wipe out the skillet and set over medium heat. When a drop of water splashed into the pan dances for a second or two and then evaporates, it’s ready. Add ½ tablespoon of the butter to coat the pan, then pour (or plop) in ¾ cup of the batter. Shake the pan to spread the batter around a bit; this will get you caramelized edges. Cook the skillet cake, undisturbed, until bubbles form and burst in the middle, leaving open holes behind, 2 to 4 minutes. Carefully flip the cake, then add a few of the cooked sausages to the edge of the pan to reheat. Cook another few minutes, until the cake is dark at its edges, its underside turns golden, and it’s cooked through. Repeat with the remaining butter, batter, and sausages.
Serve
Serve the skillet cakes warm with the sausages and maple syrup.
Keeps
The corn kernels and sausages, 3 days, after thawing, kept cold; the dry mix, 5 days, unrefrigerated, or 2 weeks, kept cold.
Instant caramelized shallot-cheese fondue
Serves 4
This is exactly the dish you pull from your pack at 7,500 feet as a prewinter storm blows past. It’s also exactly the dish you pull from your pack while car camping on a crisp fall day when everybody’s got rosy cheeks and ridiculous smiles and they’re high on that whole outdoor life thing. Wherever you make it, this one-pot is drop-dead easy and crazy delicious, and it will make you a bona fide backcountry star.
Ingredient Weight: 2½ pounds
[cooler] [fire] [stove] [backpack] [paddle] [car/rv]
At home
1 tablespoon salted butter
3 small shallots, thinly sliced
¼ teaspoon kosher salt
12 ounces Gruyère cheese, rind removed
1 tablespoon cornstarch
Scant 1/8 teaspoon freshly grated nutmeg
At camp
1 cup dry white wine (thawed) [F]
Prepared cheese and shallots (thawed) [F]
1 crusty baguette
A few hardy, crunchy dippables such as endive leaves, or apple slices
Caramelize the shallots
In a small skillet over low heat, melt the butter. Add the shallots and salt and let them caramelize slowly and gently, stirring occasionally, until they’re tender, sweet-tasting, and an appealing hazelnut brown, 15 to 25 minutes.
Let the shallots cool, then wrap tightly in a small piece of parchment paper or wax paper.
Prep the cheese
Meanwhile, over a small bowl, grate the Gruyère on the coarse side of a box grater. Add the cornstarch and nutmeg and toss to combine thoroughly.
Pack the cheese mixture into a resealable bag or airtight container, stick the packet of caramelized shallots inside the bag (on top of the cheese), seal the bag, and refrigerate or freeze. (The cheese mix and shallots will keep for 1 month, frozen.)
Melt, burble, and serve
In a small saucepan over medium heat, bring the wine to a simmer. Add the cheese mixture and shallots. Decrease the heat to low and stir to melt the cheese.
Once the cheese has melted and the fondue is bubbling gently, decrease the heat to its lowest setting. Your goal is warm, very gently bubbling cheese. If your stove’s lowest setting has the cheese bubbling furiously, feel free to shuttle the pan on and off the burner.
Serve the fondue with sliced or torn bread and crunchy dippables, as well as forks if there are known double-dippers in your midst.
Keeps
3 days, unrefrigerated, or up to 1 week, kept cold
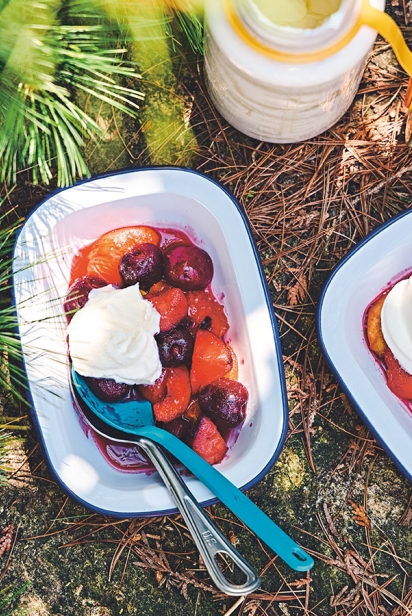
Roasted stone fruit with wild-whipped cream
Serves 4 to 6
Warm, ripe, peak-season fruit is flecked with vanilla sugar and caramelized on a glowing fi re. The whipped cream — shaken up in a wide-mouth water bottle — is almost too much delicious. Almost, but also not at all. For the stone fruit, peaches, plums, nectarines, apricots, and cherries are all ideal.
Special equipment
Heavy-duty aluminum foil, 18 inches wide
Ingredient Weight: 2 pounds
[cooler] [fire] [paddle] [car/rv]
At home
¼ cup granulated sugar
Zest of ½ lemon
½ vanilla bean
At camp
1½ pounds fresh, ripe stone fruit
Prepared vanilla sugar
1 cup cold whipping cream (thawed) [F]
Prep and pack the vanilla sugar
In a small bowl, combine the sugar and lemon zest.
Using a sharp knife, slit open the vanilla pod, then scrape its sticky black pulp — the seeds — into the lemon sugar. Reserve the pod. Rub the mixture with your fingers to break up the pulp and distribute it evenly.
Transfer the vanilla sugar and reserved pod to an airtight container or resealable bag. (The pod will add flavour when the fruit roasts.)
Chop, season, and wrap the fruit
Remove the pits from the fruit, then chop the fruit into bitesize pieces.
Cut a double layer of heavy-duty aluminum foil that measures 22 inches long. Transfer the fruit onto the foil and arrange lengthwise down the middle of the foil, stopping 2 inches shy of either end.
Sprinkle the fruit with the sugar, add the vanilla pod, and toss to coat. Gather together the long edges of the foil, folding them over each other two to three times to form a tight seal. Seal both ends of each packet in the same way — you want to avoid any leaking.
Roast the fruit
Set the foil packet on a grill placed over medium-hot coals, or directly beside them. Roast the fruit, turning the packet occasionally, until it feels very tender through the foil and smells incredible, about 25 minutes.
Cut a hole through the top of the packet and continue roasting until the juices have reduced and thickened and the pieces of fruit are beginning to colour in spots, about 5 minutes more.
Whip the cream and serve
Meanwhile, pour the whipping cream into a clean, 32-ounce, widemouth water bottle and seal. Shake vigorously until the cream forms soft peaks (or your arms give up), 4 to 8 minutes. Spoon the roasted fruit and its juices into bowls or mugs, then top with dollops of the whipped cream. Serve immediately.
Keeps
The vanilla sugar, 6 months, unrefrigerated
Excerpted from Cook It Wild by Chris Nuttal-Smith. Copyright © 2023 Chris Nuttal-Smith. Photography by Maya Visnyei and illustrations by Claire McCracken. Published by Penguin, an imprint of Penguin Canada, a division of Penguin Random House Canada Limited. Reproduced by arrangement with the Publisher. All rights reserved.