Cultured Butter
Cultured butter contains live bacterial cultures that give the butter a flavourful tang. Raw milk naturally contains bacterial cultures that act to ferment and preserve cream by keeping harmful bacteria away. When using pasteurized cream, which most of us have access to, add yogurt or kefir to create a culture within the cream.
While it takes some time to make, one taste and you’ll be ready to start your own creamery… if only for a minute. If nothing else, it will make you respect the basic process and appreciate this lovely handmade foodstuff. Depending on the cream you use, the percentage of butterfat will likely vary. Likely it will be higher than standard store- bought butter, which must contain at least 80% butterfat and where production is standardized. For that reason, baking with this butter may give you unexpected results. Besides, this stuff is heavenly; we think it is best used to anoint a slice of your best crusty bread. Be sure to save the buttermilk you’ll get — yes, real buttermilk — to marinate a chicken or make some pancakes, upon which you will spread some more of this delicious butter.
Ingredients
500 ml high-quality organic whipping cream
1½ tablespoons kefir or yogurt with live culture
2 to 3 teaspoons salt
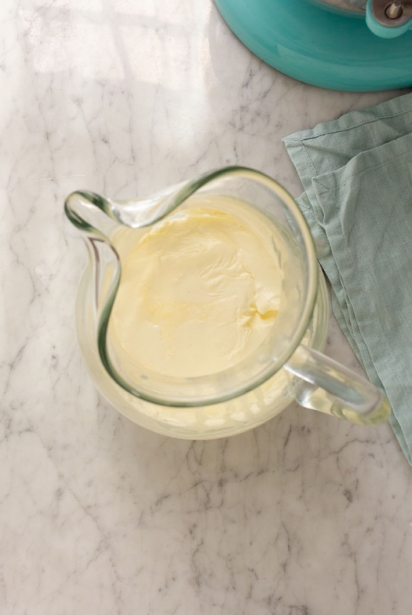
Place the cream in a large bowl or jug and start the culturing process by adding kefir or yogurt to the bowl. Cover with a cloth and leave at room temperature for 24 to 48 hours. The mixture will become thick and have a slight sourness.
Before beginning the churning process, chill the cream for one hour.
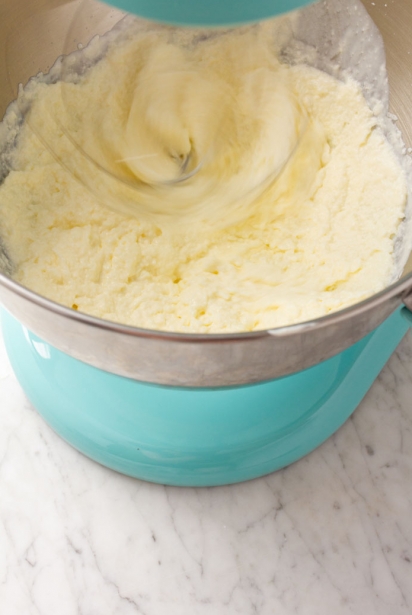
Begin beating the cream in the stand mixer bowl on a high speed using the whisk attachment. Keep watch as the cream transforms through various stages from soft peaks to stiff peaks and then as the grainy fat molecules begin to separate.
At this stage, as the mixture separates, more and more liquid will accumulate and will begin to splash as the butter is beaten at high speed. Cover the bowl carefully with a splash guard or use a tea towel draped over the top of the mixture. Be extremely careful when placing the tea towel to ensure that it cannot become tangled in the beaters.
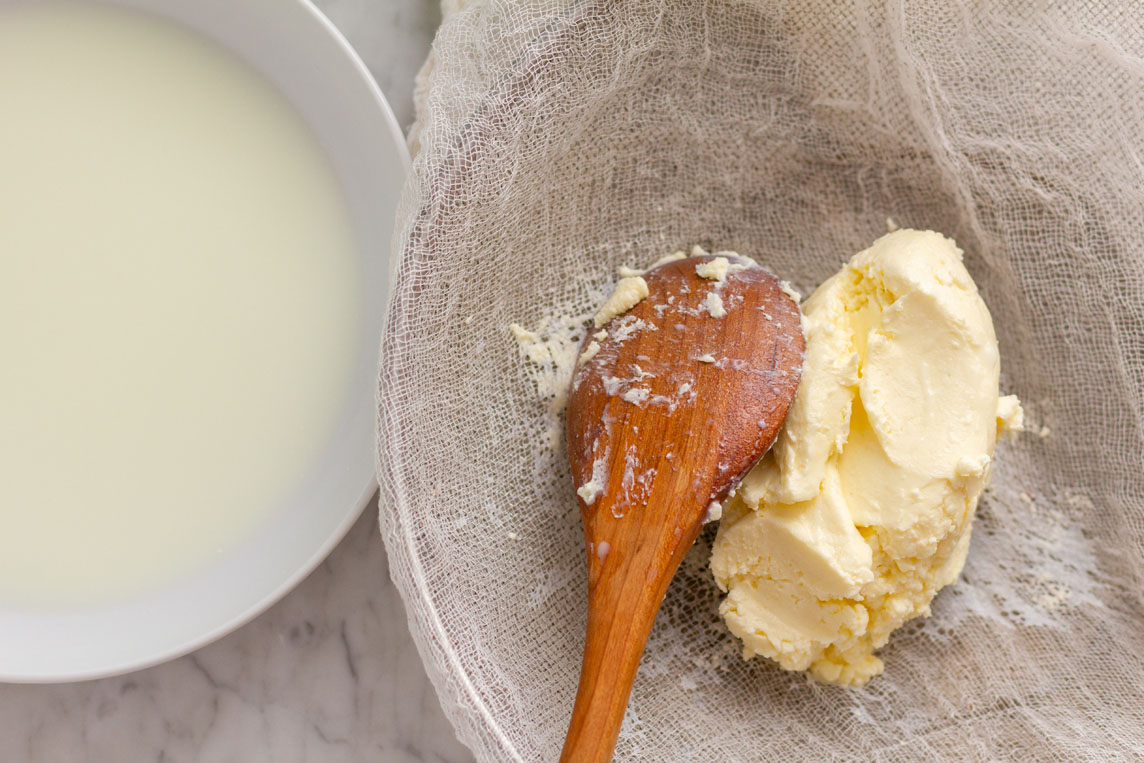
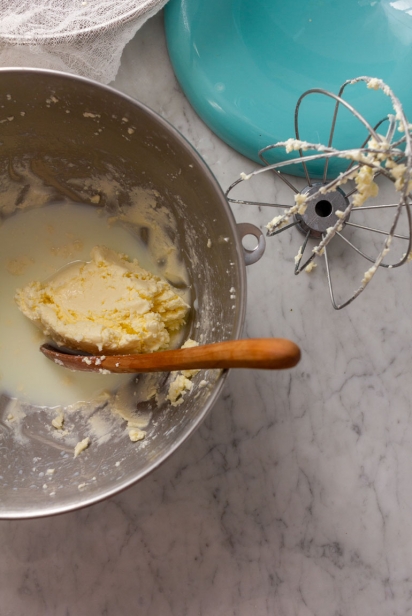
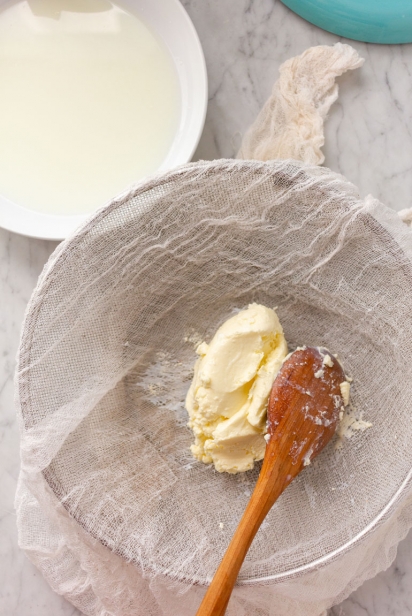
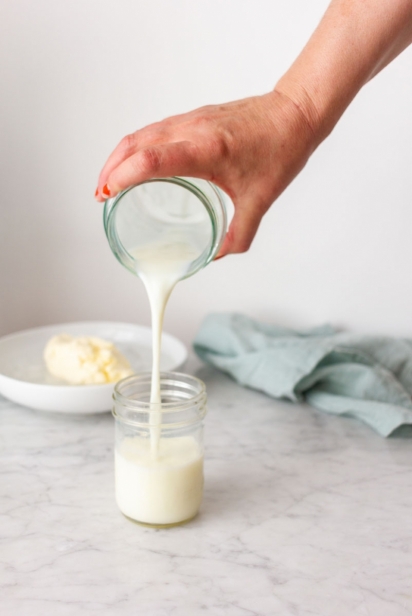
After a time, the butter will conglomerate on the beater and the liquid will remain in the bowl — this is the buttermilk. Stop the mixer and press any stray butter into the main mass and strain and reserve the buttermilk using a sieve lined with cheesecloth.
Return the butter to the bowl, and using the paddle at- tachment, beat the butter to extract any remaining liquid. Strain. Press the butter together using a wooden spoon against the side of the bowl.
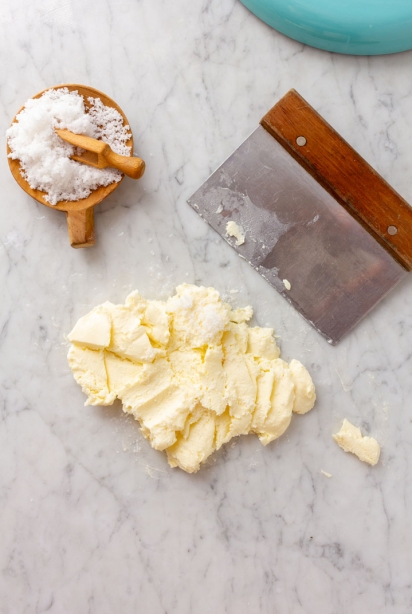
Fill a bowl with ice water and place the mass of butter into the ice-cold water. Rinse the butter by squeezing it through your hands. Repeat several times, changing the ice water until the water runs clear.
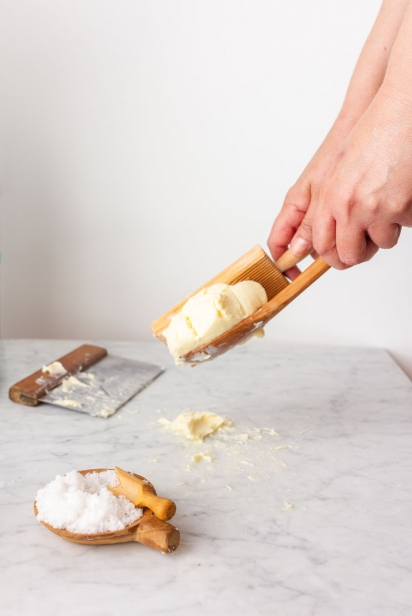
On a clean surface, use a bench scraper to spread out the butter. Add salt, a little at a time, working it through with the bench scraper and tasting it as you go to ensure it is to your liking.
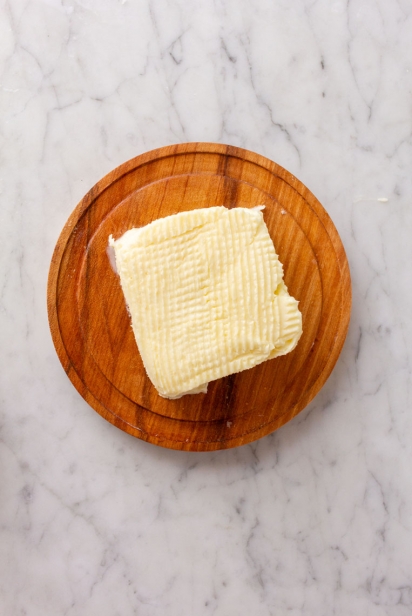
Scrape the butter up and use two wooden spoons, a gnocchi paddle or butter paddles to press the butter into a pat. Wrap in parchment and chill. Savour the taste of the sweet cream with just a hint of pleasant sourness. Store in the fridge for up to 3 weeks.